01. What Is Crypto Payment Processor?
- Crypto Payment Processor acts as a bridge between the merchant’s website and the cryptocurrency network, allowing the merchant to receive payments in the form of cryptocurrency.
02. What kind of services we are providing on our plugin?
- 100% free plugin
- No bank account requires
- No chargebacks
- Accept crypto payments from all over the world
- Accept all major cryptocurrencies
- Multiple wallets support
- Free customer support
- Low transaction fee
04. Configuration of Plugin
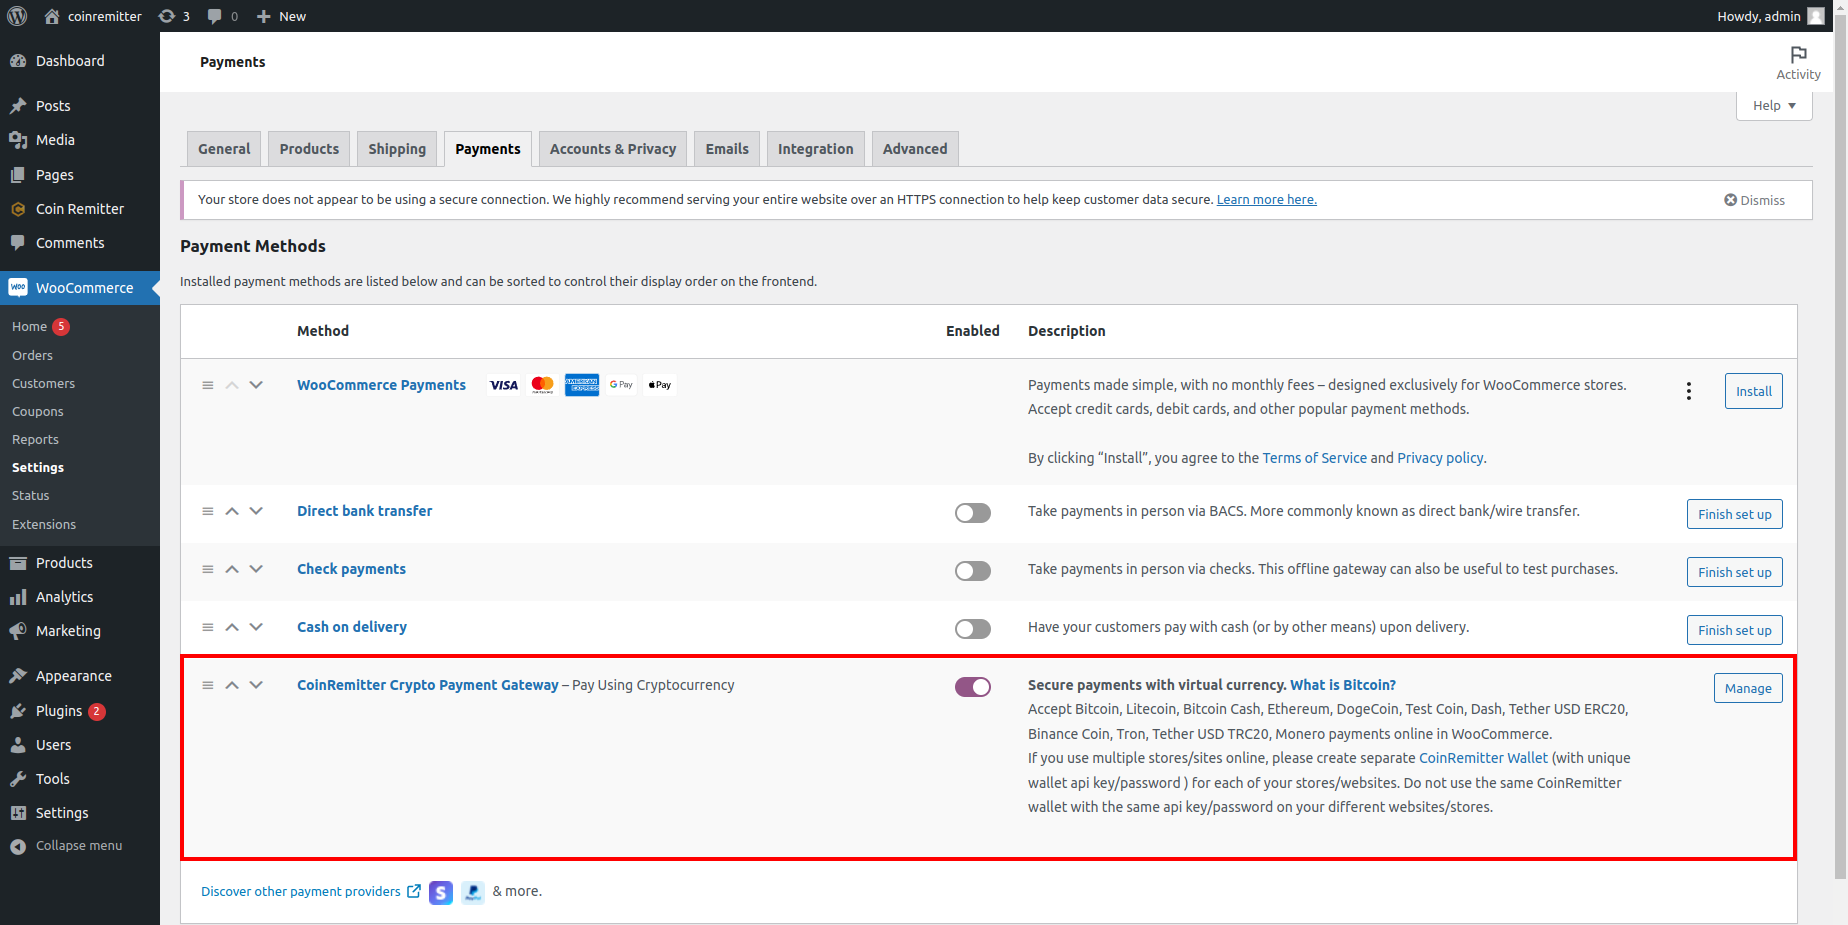
PATH: Sidebar > WooCommerce > Settings > Payments > CoinRemitter Crypto Payment Gateway > Manage > Save changes
- Go to the sidebar of wordpress’s admin panel.
- Click the Woocommerce option and select Settings.
- Now, you will need to locate the Payments section in the Settings.
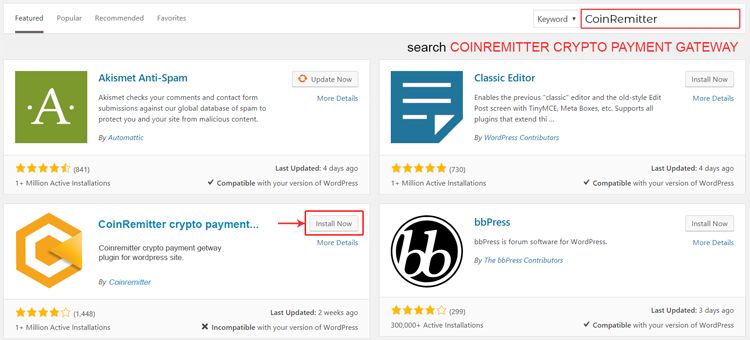
- You’ll find a Coinremitter plugin there.
- Click Manage at the end of the same line.
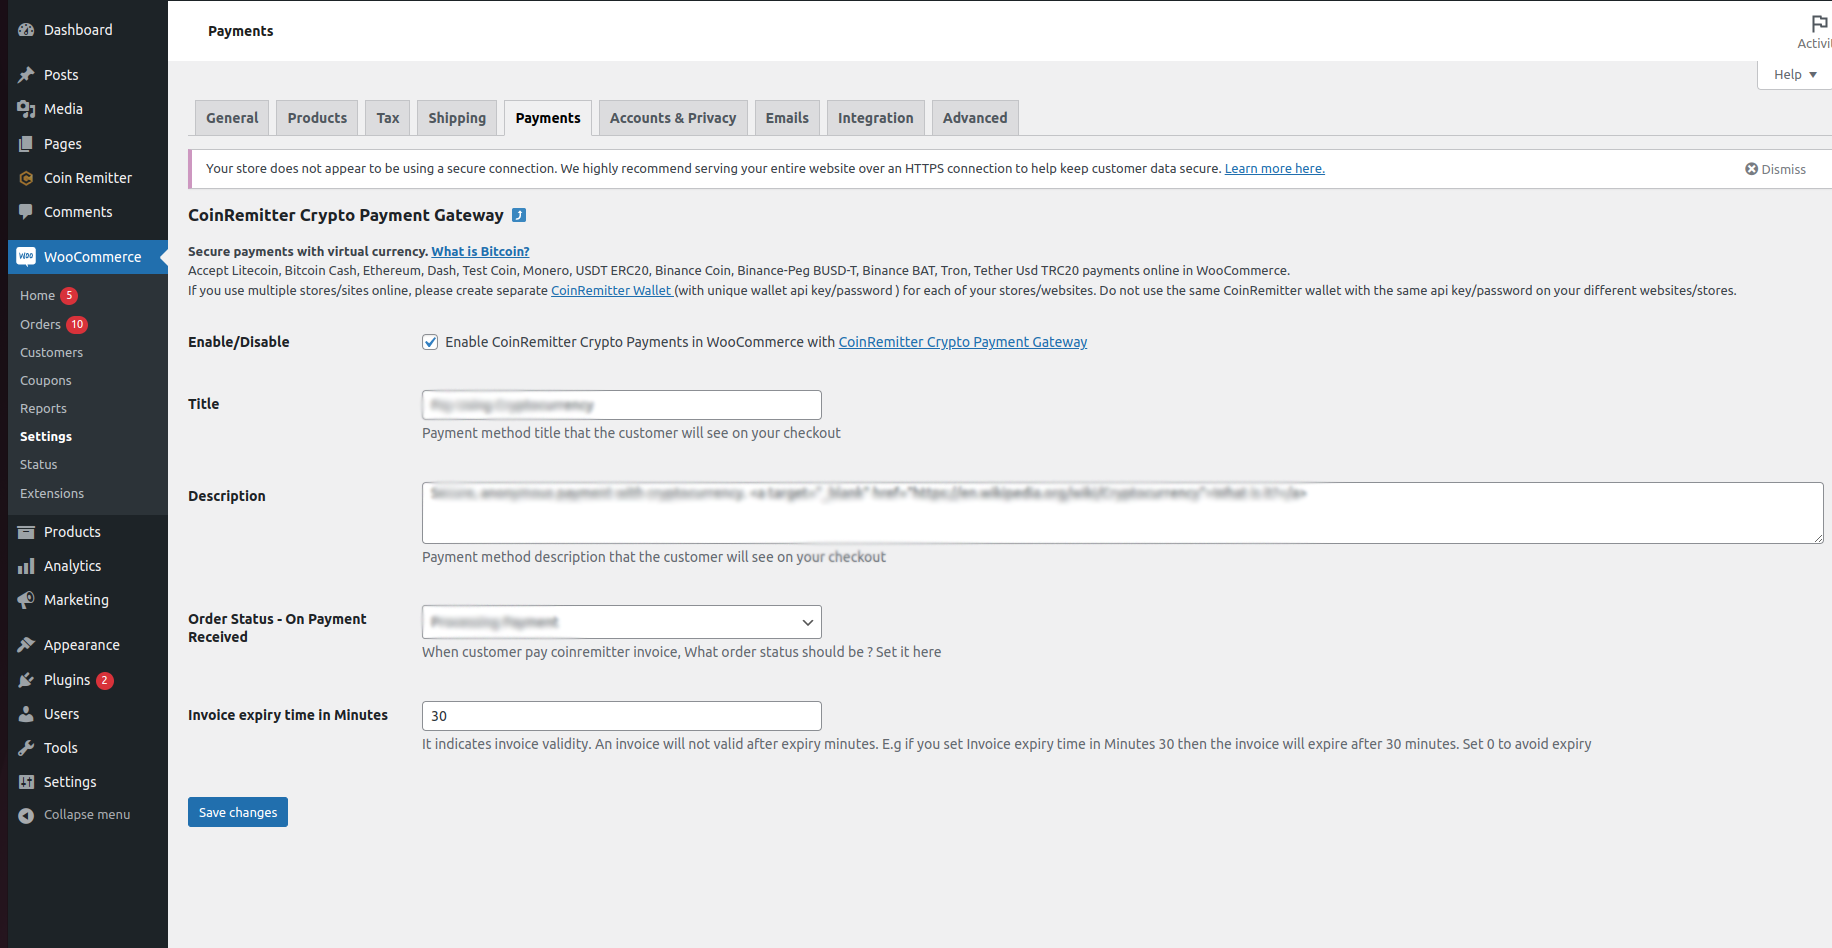
- The configure settings page will be opened.
- TITLE: The title written by you will appear on the checkout page.
- DESCRIPTION: You can add a few details to tell the customer something important before the customer takes any step during checkout.
- ORDER STATUS: Set the order status, when customers successfully make a payment using cryptocurrency.
- INVOICE EXPIRY TIME IN MINUTES: If you’ve set the value to 30 then the generated invoice will expire after 30 minutes.
- That’s all, save the setting.
05. How to link a Coinremitter wallet on your website?
- First you install and activate this plugin.
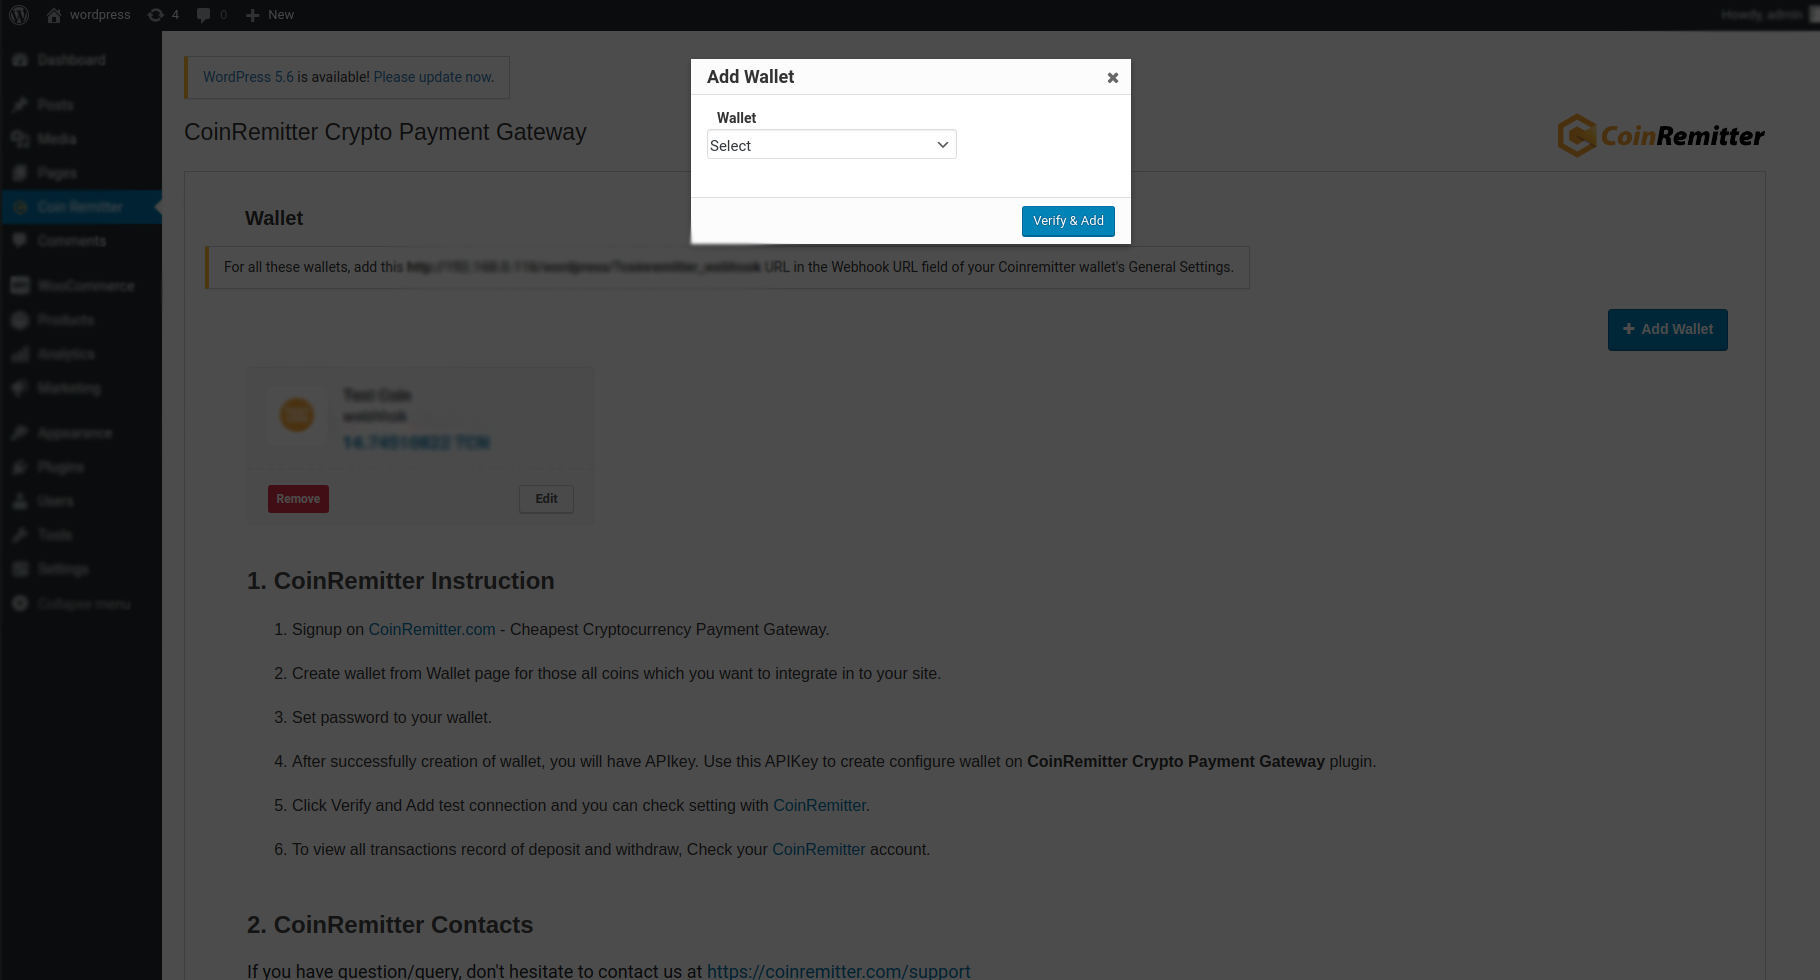
- click on the sidebar menu name Coinremitter.
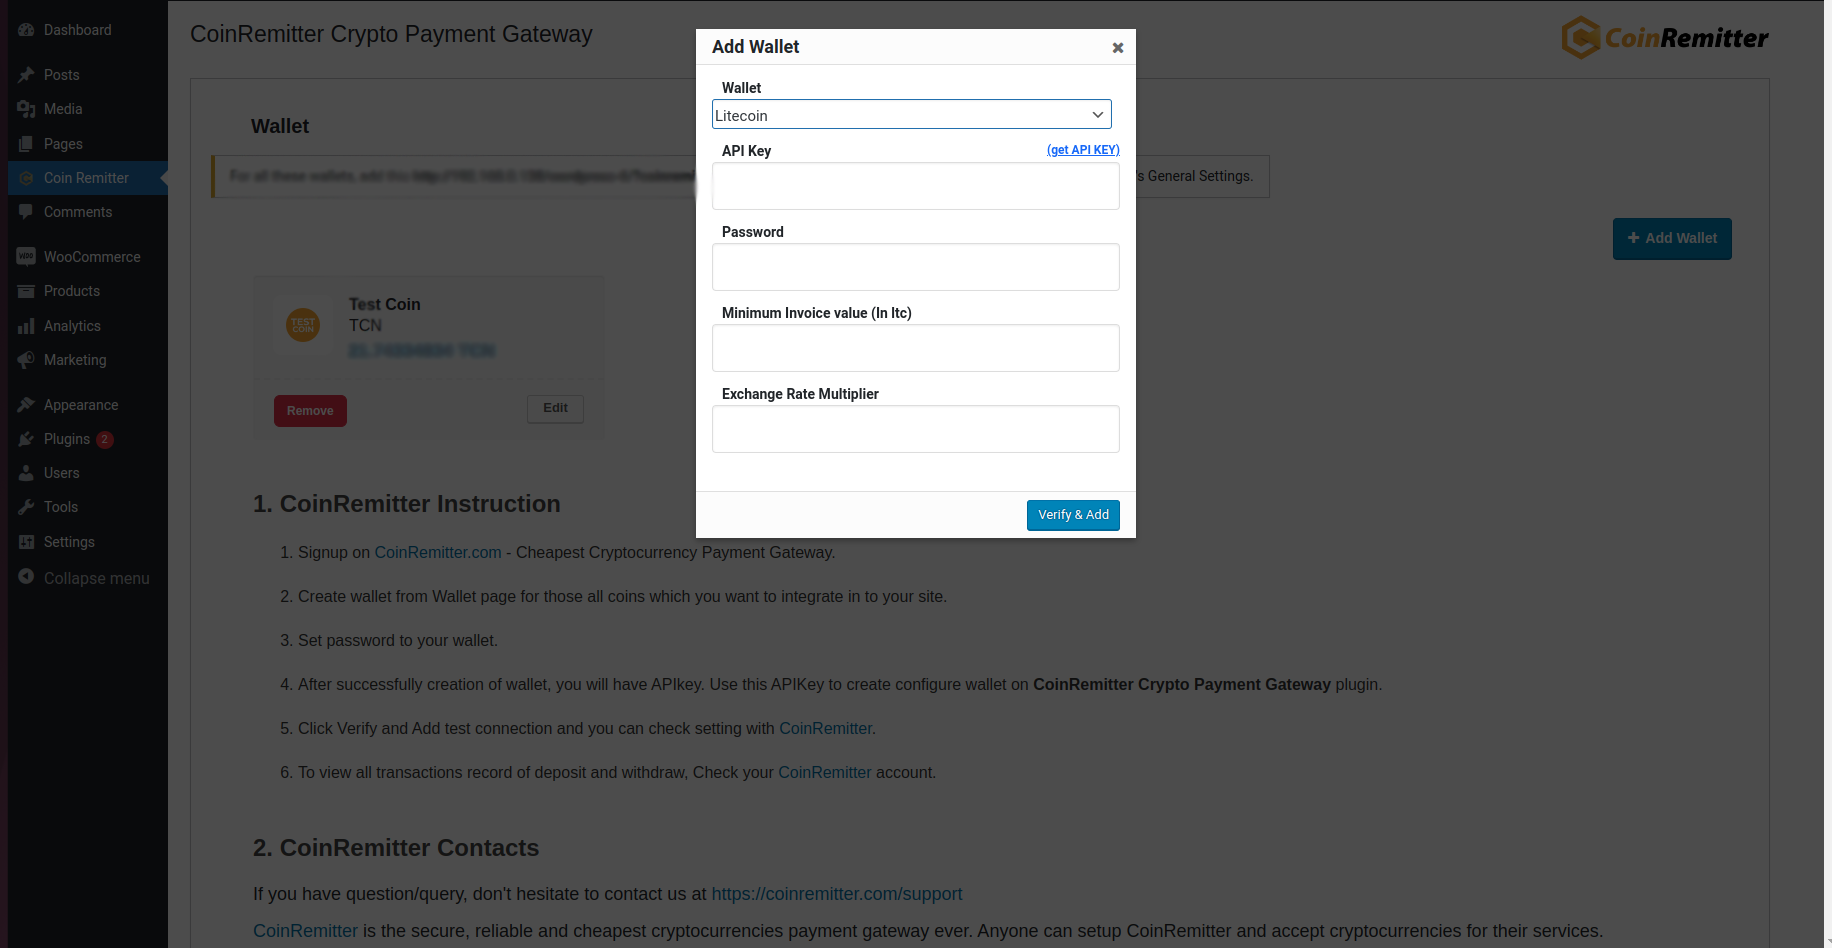
- Click on Add Wallet. It will open a popup.
- You need to select a coin. Options will be like BITCOIN, ETHEREUM, TRON, USDT ERC20, DASH, etc.
- For API key and Password You can get it from your coinremitter account. Please follow this instruction to create a wallet.
- Paste the API key and Password from your Coinremitter wallet.
- Exchange Rate Multiplier: We suggest you set it to 1. For instance, if you set it to 1.10, then prices for cryptocurrencies will be increased by 10%, and you can set it to 0.95 in this text box for a 5% discount.
- Minimum Invoice Value: Setting the minimum invoice limit is necessary, The generated invoice won't be less than the minimum invoice limit.
- Now click on Verify & Add.
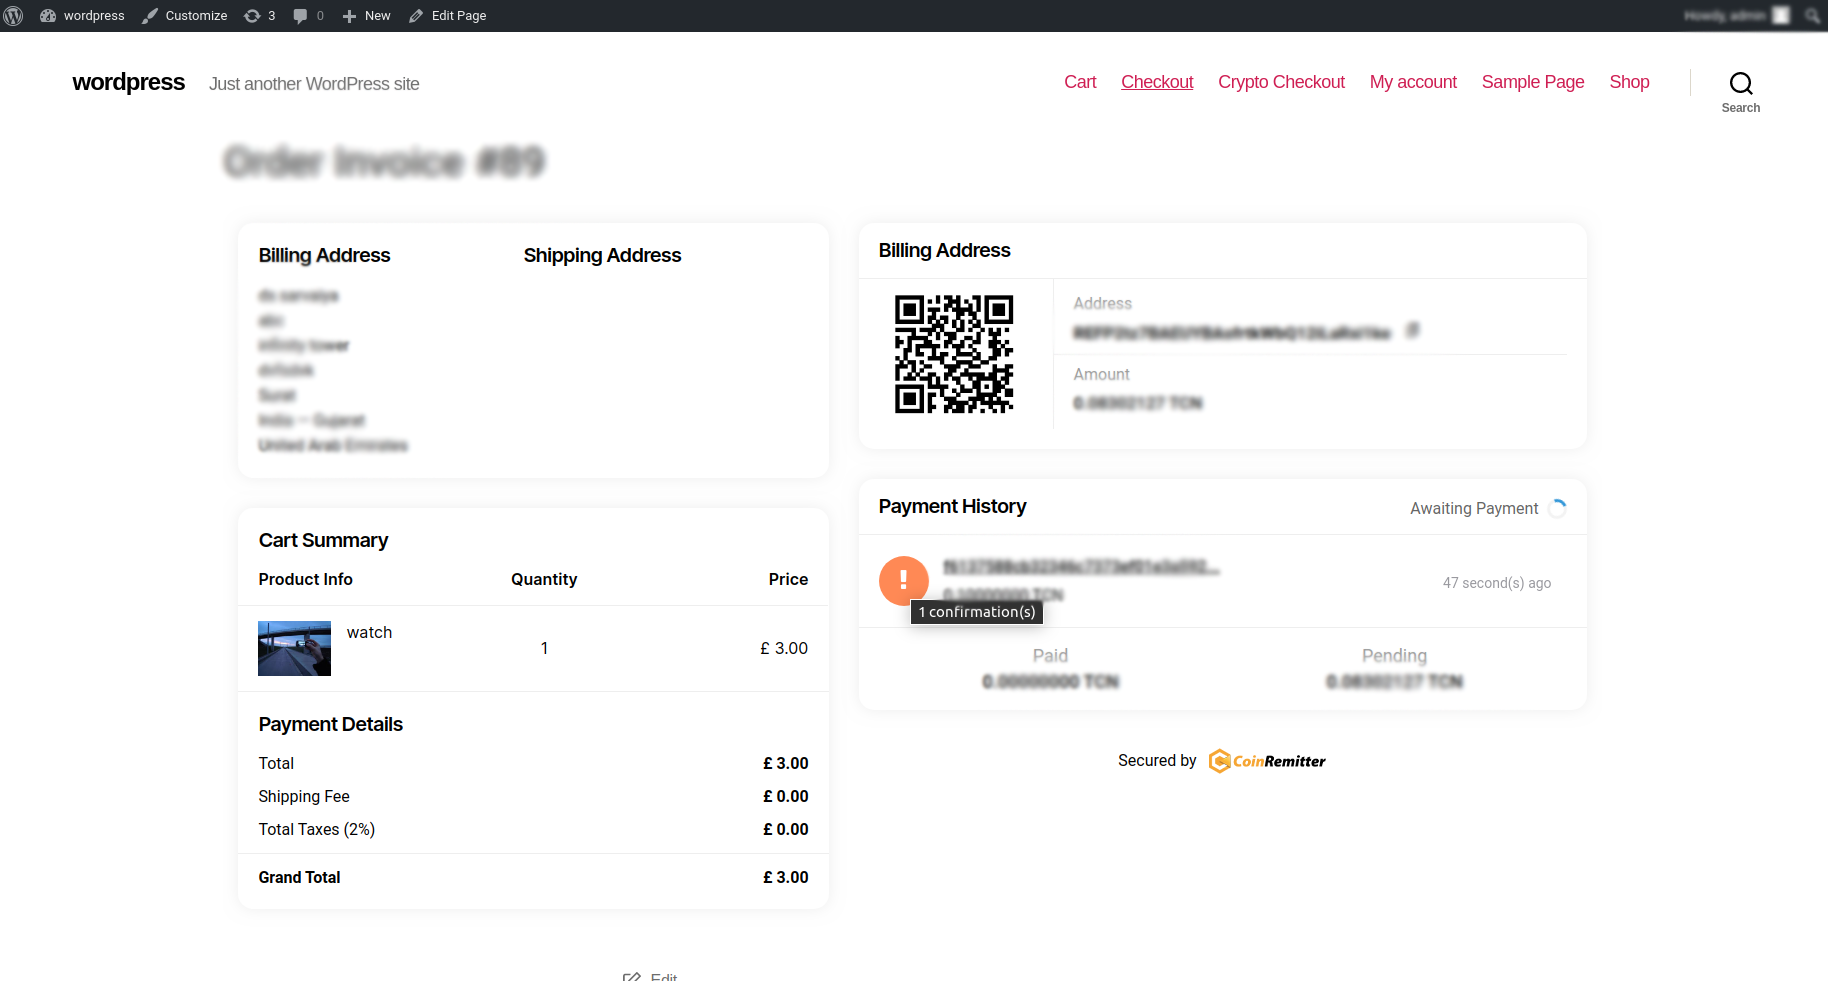
- Congratulations! You have successfully linked your wallet. It will display the wallet on the same page.
- Now you can accept and receive payments in your wallet.
- You can also add multiple wallets the same way for other coins.
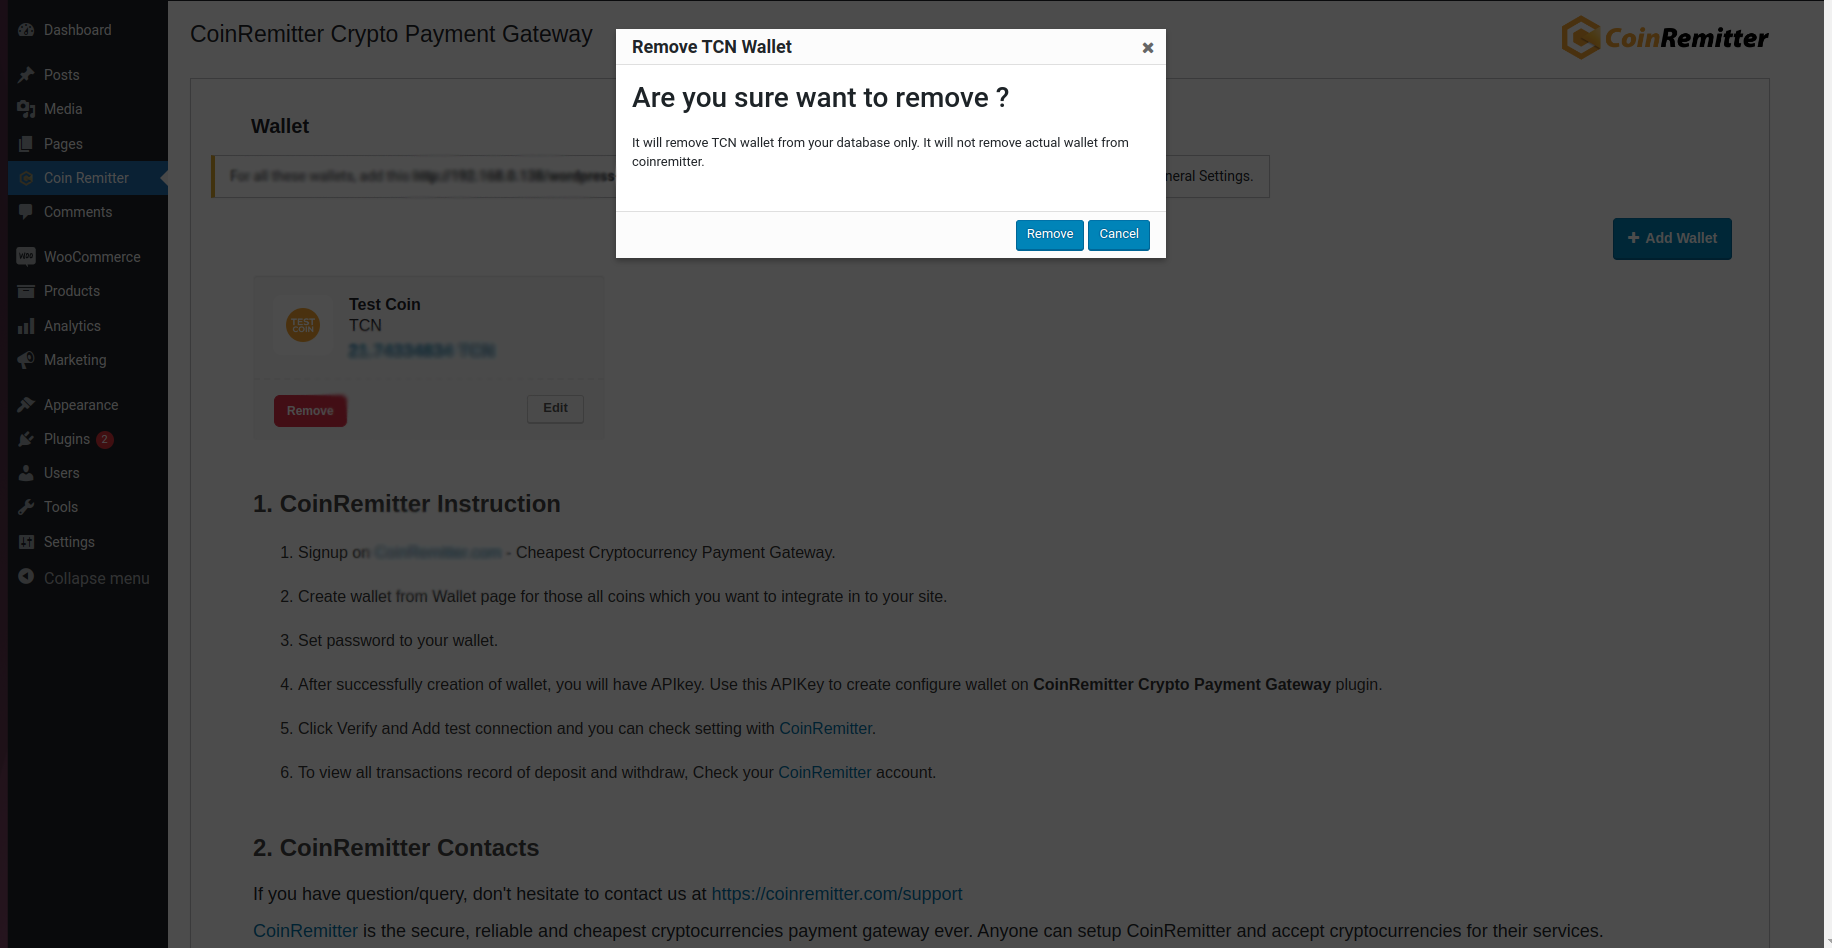
- If you want to remove your wallet then click on the Remove button. It will just disconnect your wallet from your WordPress but you can still use the same credential in the future.
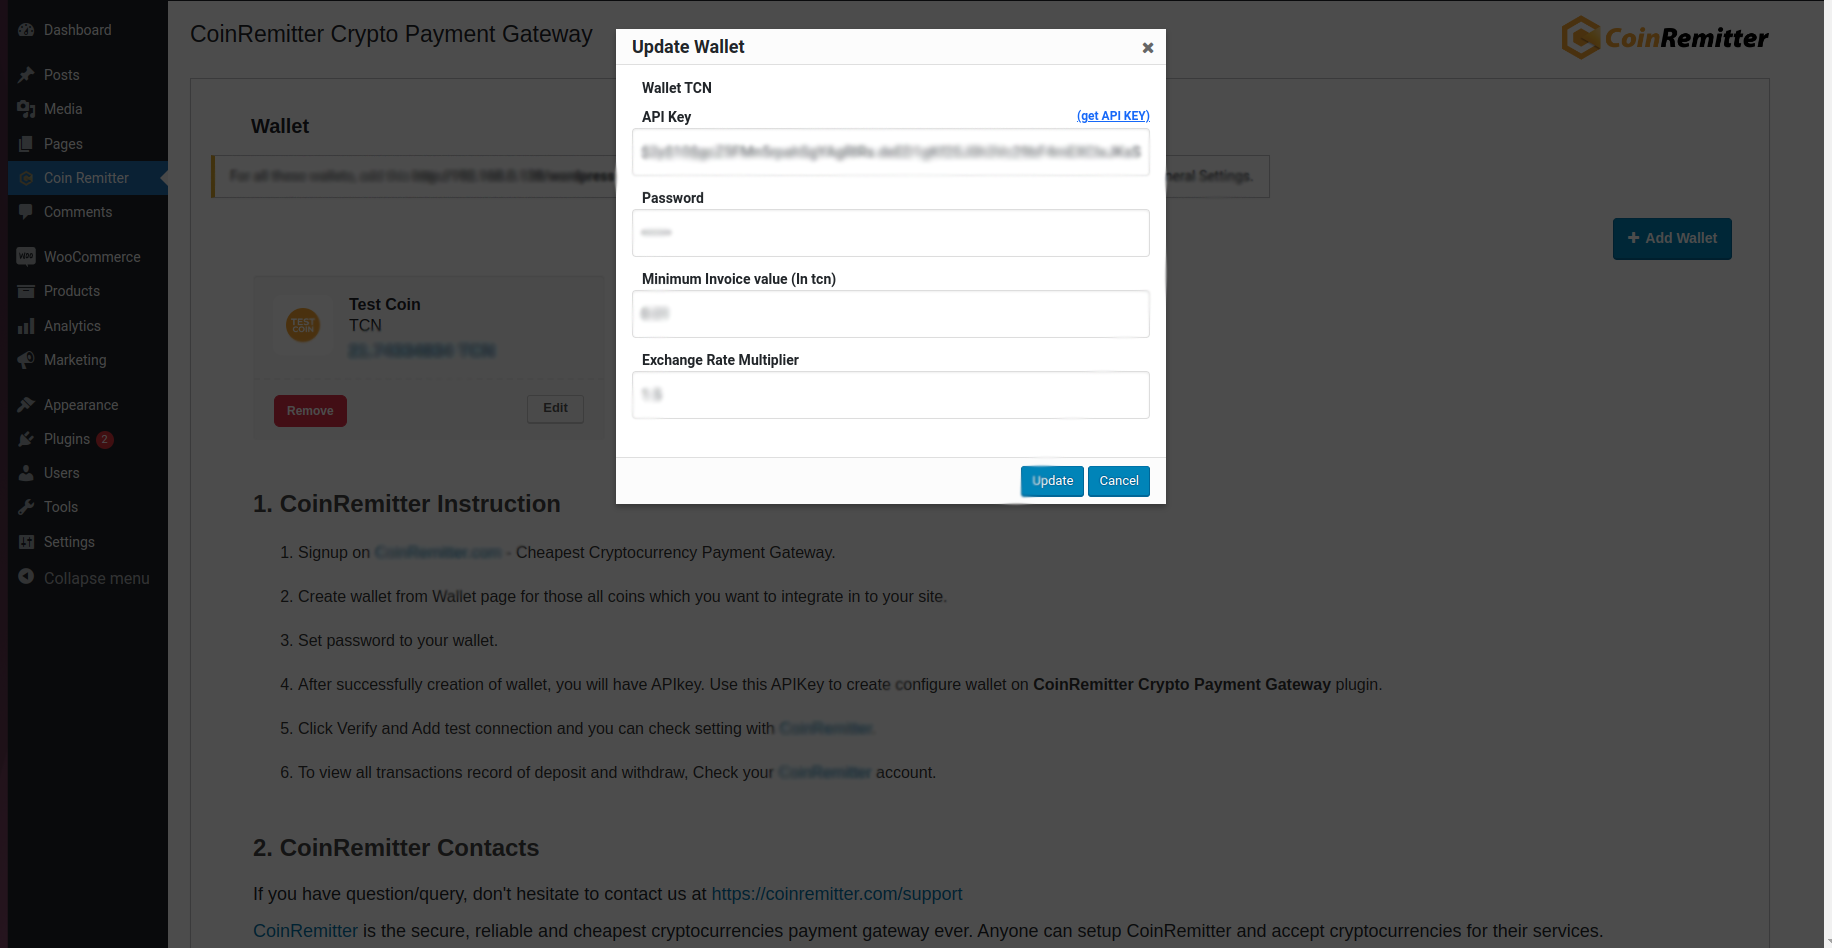
- If you want to change the password of your wallet first you have to change the password of that wallet from your Coinremitter wallet then you can change it on your WordPress site.